Whether you’re totally overhauling an area of your house or you’re just upgrading a few aspects of your kitchen, it pays to be prepared for your next DIY home renovation. A DIY renovation project isn’t something you can afford to improvise; being better prepared will lead you to better outcomes, a safer and more pleasant environment, and possibly even cost savings.
So what are the most important preparatory steps to take before the project begins?
1. Invest in Safety Equipment
Safety should be your highest priority when planning a renovation, so your first step should be procuring proper safety equipment.
Depending on what you’re doing, these are probably some of the most important acquisitions:
- Eye protection. Any environment that will kick up dust and debris practically requires eye protection like safety goggles and/or face shields.
- Hand and arm protection. Protective gloves, nitrile gloves, and other forms of protection may be required as well.
- Foot and leg protection. If you’re going to be walking in a construction area with regularity, you need a tough set of boots to protect your legs and feet from hazards.
- Respiratory gear. You may also need protection for your respiratory system; a face mask or a respirator could be a literal lifesaver.
When buying safety and protective equipment, always make sure the equipment fits properly and can be used as intended. It’s also a good idea to have some backups available in case you lose or damage your primary equipment.
2. Rent a Dumpster

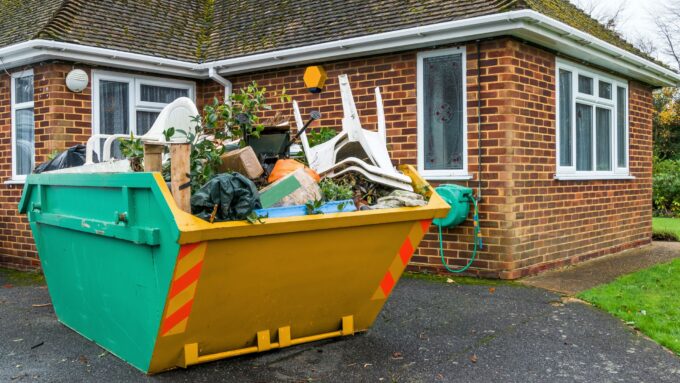
Renting a dumpster can make your life easier in several ways. The dumpster will likely be delivered straight to your property, giving you an immediately accessible way to dispose of old and unnecessary materials without having to drive to a landfill or waste disposal center. When the dumpster is full, the company will pick it up for you – and you can enjoy your new home renovation.
According to SourGum.com, one of the most important steps to take in advance of renting a dumpster is estimating the size you need. If the dumpster is too small, you could end up with leftover waste – but you also don’t want to overpay for a dumpster you don’t truly need. Contact a dumpster rental facility for more information on proper sizing; they can provide a recommendation based on your renovation goals.
Additionally, you should know that certain materials cannot be disposed of in a dumpster. Review the company guidelines before using the dumpster.
3. Create a High-Level Plan
Create a high-level plan for how you’re going to execute your home renovation.
Consider the following:
- Scope of work. What exactly are you trying to do? How are you going to do it? Outlining this formally will prevent your work requirements from spiraling out of control. It’s also an opportunity to create a step-by-step process you can follow from here.
- Budget. Set a firm budget for the home renovation. It’s important to estimate conservatively here, since you’ll probably run into a few costly surprises as the project develops. But you should have at least some financial guidelines in place so your costs don’t inflate unnecessarily.
- Timing. When are you going to start this project? How long will each phase of the project take? What’s the worst-case scenario for getting this project complete? How long will you be without certain home amenities?
4. Create Backup Plans

Even the best-laid renovation plans can go wrong, so it pays to have backup plans in place.
Consider the possibilities:
- Inventory issues. You probably already know what materials you’re going to need, but do you know for sure that those materials will be available when it’s time to purchase them? If certain materials aren’t available, is there a different material you can use?
- Unexpected discoveries. Let’s say you tear down a wall and find that the electrical wiring is a total mess. How would you handle this type of unexpected discovery?
- Budget constraints. Is there a firm upper limit to what you’re willing to spend on this? What will you do if you get close to that threshold?
- Knowledge/skill gaps. What’s the limit of your current DIY knowledge and experiences? What weaknesses do you have?
5. Manage Inconveniences
Significant home renovations often come with inconveniences – like not being able to access your kitchen for a couple of weeks. You’ll need to find ways to manage these inconveniences if you and your family want to minimize stress.
- Missing appliances. Will you lose access to certain appliances during this renovation? Can you borrow a friend’s or neighbor’s appliances temporarily? Can you find public establishments that offer these types of services (like a laundromat offering washers and dryers)?
- General accommodations. Would it be more convenient for you and your family to live in a hotel room for a few days while you work on the house? This is an especially attractive option if there are any hazards present in the renovation.
- Health/safety risks. Renovations and repairs can sometimes introduce health and safety hazards into your home environment. Make sure you review the possibilities carefully and mitigate these risks to the best of your ability.
6. Double Down on Your Knowledge

Even if you’re an experienced DIYer, it’s important to recognize the potential limitations of your knowledge – and close any gaps you find. Review your home, review your plan, and consult with experts to verify that you know what you’re doing. YouTube tutorials, quick consultations, and online guides can all be of service here.
7. Be Ready to Call for Backup
What happens if you get in over your head? No matter how confident you are in your ability to see this project through, you should have a plan for calling for backup. Is there a home improvement expert or contractor who can help you out?
The more time and effort you spend preparing your home for your next DIY renovation, the smoother the project will unfold. If you’re willing to be proactive, you’ll be safer, your project will close faster, and you’ll be less stressed throughout the process.


